
- Sky
- Blueberry
- Slate
- Blackcurrant
- Watermelon
- Strawberry
- Orange
- Banana
- Apple
- Emerald
- Chocolate
- Charcoal


Dustpuppy
-
Content Count
75 -
Joined
-
Last visited
-
Days Won
19
Posts posted by Dustpuppy
-
-
While i was testing how to make the print server management for my gui, i wrote print server and a client, that will not need the gui.
All you need is gamax92s vcomponent lib for the client. Install it over oppm, or get it here https://github.com/OpenPrograms/gamax92-Programs/tree/master/vcomponent
Start the server first, then the client(s).
Server has no queue. It will use the openprinter when data comming in. Timing is by your self.
The code for the server. Start it with parameter "silent" to get it to background.
local component = require("component")
local event = require("event")

local args = { ... }

local silent = false
if #args > 0 then
  if args[1] == "silent" then
    silent = true
  end
end

if not component.isAvailable("openprinter") then
  io.stderr:write("This program requires openprinter to run.")
  return
end
local printer = component.openprinter

if not component.isAvailable("modem") then
  io.stderr:write("This program requires a modem to run.")
  return
end
local modem = component.modem
local printServerPort = 9100
modem.open(printServerPort)


local function modemCallback(_, _, from, port, distance, ...)
  local message = {...}
  if silent == false then
    if message[2] then
      print(from .. " " .. tostring(port) .. " " .. message[1] .. " " .. message[2])
    else
      print(from .. " " .. tostring(port) .. " " .. message[1])
    end
  end
  if port == printServerPort then
    if message[1] == "GET PRINTER" then
      addr = printer.address
      modem.send(from, printServerPort, addr)
    elseif message[1] == "WRITELN" then
      addr = message[2]
      if addr == printer.address then
	str = message[3]
	col = message[4]
	al = message[5]
	printer.writeln(str, col, al)
      end
    elseif message[1] == "SETTITLE" then
      addr = message[2]
      if addr == printer.address then
	str = message[3]
	printer.setTitle(str)
      end
    elseif message[1] == "GETPAPERLEVEL" then
      addr = message[2]
      if addr == printer.address then
	modem.send(from, printServerPort, printer.getPaperLevel())
      end
    elseif message[1] == "GETCOLORINKLEVEL" then
      addr = message[2]
      if addr == printer.address then
	modem.send(from, printServerPort, printer.getColorInkLevel())
      end
    elseif message[1] == "GETBLACKINKLEVEL" then
      addr = message[2]
      if addr == printer.address then
	modem.send(from, printServerPort, printer.getBlackInkLevel())
      end
    elseif message[1] == "CLEAR" then
      addr = message[2]
      if addr == printer.address then
	printer.clear()
      end
    elseif message[1] == "PRINT" then
      addr = message[2]
      if addr == printer.address then
	printer.print()
      end
    elseif message[1] == "PRINTTAG" then
      addr = message[2]
      if addr == printer.address then
	str = message[3]
	printer.printTag(str)
      end
    end
  end
end


event.listen("modem_message", modemCallback)

if silent == false then
  while true do
    os.sleep(0)
  end
end
and the code for the client.
local component = require("component")
local ser = require("serialization")
local vcomp = require("vcomponent")
local modem = component.modem
local event = require("event")

local printServerPort = 9100

modem.open(printServerPort)
local netprinter = {}

local printerList = {}

function getPrinterAddress(addr)
  for i = 1, #printerList do
    if printerList[i].server == addr then
--      print(printerList[i].server .. "->" .. printerList[i].printerAddress)
      return printerList[i].printerAddress
    end
  end
end

local netprinterproxy = {}
local netprinterdocs = {}


function netprinter.register(addr)
  netprinterproxy.printerAddress = function() return getPrinterAddress(addr) end
  netprinterproxy.writeln = function(str, col, al) modem.send(addr, printServerPort, "WRITELN", getPrinterAddress(addr), str, col, al) end
  netprinterproxy.setTitle = function(str) modem.send(addr, printServerPort, "SETTITLE", getPrinterAddress(addr), str) end
  netprinterproxy.print = function(str) modem.send(addr, printServerPort, "PRINT", getPrinterAddress(addr)) end
  netprinterproxy.clear = function(str) modem.send(addr, printServerPort, "CLEAR", getPrinterAddress(addr)) end
  netprinterproxy.getPaperLevel = function()
    modem.send(addr, printServerPort, "GETPAPERLEVEL", getPrinterAddress(addr))
    local ev, _, from, port, distance, message = event.pull(0.5,"modem_message")
    if ev then
      if message then
	return message
      end
    end
  end
  netprinterproxy.getColorInkLevel = function()
    modem.send(addr, printServerPort, "GETCOLORINKLEVEL", getPrinterAddress(addr))
    local ev, _, from, port, distance, message = event.pull(0.5,"modem_message")
    if ev then
      if message then
	return message
      end
    end
  end
  netprinterproxy.getBlackInkLevel = function()
    modem.send(addr, printServerPort, "GETBLACKINKLEVEL", getPrinterAddress(addr))
    local ev, _, from, port, distance, message = event.pull(0.5,"modem_message")
    if ev then
      if message then
	return message
      end
    end
  end
  netprinterproxy.printTag = function(str) modem.send(addr, printServerPort, "PRINTTAG", getPrinterAddress(addr)) end
  vcomp.register(addr, "nprinter", netprinterproxy, netprinterdocs)
end


function netprinter.getPrinterList()
  printerList = {}
  modem.broadcast(printServerPort, "GET PRINTER")
  for i = 1, 20 do
    local ev, _, from, port, distance, message = event.pull(0,"modem_message")
    if ev then
      local tmpTable = {}
      tmpTable.server = from
      if message then
	tmpTable.printerAddress = message
	table.insert(printerList, tmpTable)
	netprinter.register(from)
      end
    end
  end
  return printerList
end

netprinter.getPrinterList()

return netprinter
a little test program
local component = require("component")
local netprinter = require("netprinter")
local ser = require("serialization")


p = component.nprinter

p.clear()
p.setTitle("test page")
p.writeln("hallo")
p.print()

print("Paper : " .. p.getPaperLevel())
print("Black : " .. p.getBlackInkLevel())
print("Color : " .. p.getColorInkLevel())
-
First release out. See main posting.
-
component.get(address: string[, componentType: string]): string | (nil, string)
Tries to resolve an abbreviated address to a full address. Returns the full address on success, orniland an error message otherwise. Optionally filters by component type. -
Give me time. In my point of view it's not finished yet. But if you want, you can port it to Plan9k. Would be great. Don't forget, that i change allways things and specialy add functions to the differend libs, that i am missing during making programs for it.
When it is finished, i will have a look to move it into oppm.
-
Getting forward :-)
Some Monitor programs done(Memory and Energy as plugins. Working on filesystem monitor now).
Getting on with the terminal window.
Insert a system menu.
Changed some internal stuff.

-
Found a little error in the printserver driver. Have uploaded a new zip archive with correct version.
If you don't want to test it your self, watch this video.
-
And the documentation is also not up to date and i am busy, 2 pregnant horses outside (one is nearly finished) and a lot of work on the visual editor and...and...WHAT THE F****?!?! I need much more time.
-
At the moment i am working on the gui, to get it faster in screen redraw and background buffering.
I've packed my full working environment into an archive.
http://carr-ireland.com/mc/all.zip
Unzip it to the home directory of the oc computer and start test.lua.
There are 2 frame work files.
program_frame.lua is how to make a program.
plugin_framework.lua is for making a symbol program.
In test.lua you can see, how to insert them.
After first start of test.lua open the user manager and add your self as user. Then delete line 31 ( wm.setUserName("") ) and uncomment user.login() in line 30 and restart the computer and the test.lua to get the multiuser environment running.
Exit is not working at the moment, but i fix this after getting other things done.
Before i forget. There's a bug in the print manager. Don't remove a printer, after add one. Close and restart the print manager first. Sometimes it hangs.
And you need a modem in the computer.
-
I think, i am getting crazy.
Worked a bit on the gui system. It will come much easier to make (let's call them) programs for it. The gui it self is a multi user windows system with driver integration and some nice features. But still can be used as stand alone windows based gui.
Multi user driver working to register user to the computer and the gui with differend level.
Printer management for openprinter with print queue.
Start menu. Just make you gui based programs and add them to the menu.
Network driver with own messaging system
Drivers will be registered to the gui. Use only, what you need.
Or use it just as a simple gui, with no driver, no start menu and no managment programs.
-
And me again.
I take also port 148 for internal usage of my gui, that is more and more getting a managed window system and port 4662 for short messages.
Think, that i will need more, as longer i am coding on the gui
-
I take 9100 for net print service
-
Print server is working :-)
-
It will come. But not for making full program as source. More for making a single window, you can then put into your program.
But first i finish the print manager for openprinters.
-
Updated. First alpha release online now.
-
Here we are!!!
I am finished for the first release....(i hope)
If you want to test it, just do "pastebin run Kz9E2JGL" on the computer in your minecraft world. You need an internet card for this.
This will install all needed files in /usr/lib/windowmanager and /etc/windowmanager.During the installation you will be ask for the admin user name and the password. You can choose, whatever you want, but best is to use your mc username, because the software will add user to the computer using (funny sentence), like useradd in OS does.
After finishing the installation just start it with "windowmanager"
Minumum requirements for the computer are, a tier 2 screen, a modem, a keyboard 640k ram and a user who use it.
I will do a proper documentation, how to make own programs, after i got some response and when i find the time.
For now, just have a look into /usr/lib/windowmanager/programs/program_frame.lua.
It's a frame work for making new programs. Or have a look into the other files in this directory.
Here's a list of functions that are available. Not complete, but i am working on the documentation.
Enjoy and have fun.
QuoteBasic functions:
wm.startGui()
Start the window manager and the program manager. (Not needed, if you use the program_frame.lua file, because windowmanager will do this allready.wm.exitGui()
Close the gui system. Attention: You need to reboot after all. Trying to fix this problem.wm.setTopText(text)
Set the text on top of the screen.wm.redraw()
Redraw the whole screen.
-------------------------------------------------------------------------------
Functions for windows:
wm.newWindow(x, y, w, h, text)
Create a new window.wm.raiseWindow(self)
Show window on screen.wm.closeWindow(self)
Close a window.wm.lowerWindow(self)
Lower a window.wm.resizeWindow(self, w, h)
Set a new size to the window.wm.disableWindowButtons(self, state)
Disable/enable the close and the lower button.wm.setWindowSticky(self, state)
Disable movement of window.wm.hideWindow(self, state)
Hide a window from the window list, even when it is lowered.wm.setOnCloseCallback(self, callback)
Callback that will called, when window is closed. If callback returns false, the window will stay open.wm.setOnLowerCallback(self, callback)
Callback that will called, when window is lowered.wm.setOnResizeCallback(self, callback)
Callback that will called, when a window is raised to the screen.wm.getWindowInfo(self)
Returns x,y,w,h,text and number of elements of a window.wm.setWindowResizable(self, state)
Enables on screen resizable of the window. If true, you can click the lower-right corner of a window
and drag/drop to new size. This is normaly disabled, because the screen will heavaly flicker.wm.getActiveWindow()
Returns the active window.wm.addElement(self, element)
Adds an element to the window.wm.newElement(id, x, y, w, h, text, callback)
This is normaly not needed. It's internal called from the gui system. Coders who want to make own
elements can use it.-------------------------------------------------------------------------------
Functions for menus
wm.newMenu(x, y, w, text, callback)
Creates a new menu. Callback will get the number of the selected entry as agument.wm.insertMenu(self, entry)
Insert an entry (just text) into the menu.wm.removeMenu(self, entry)
Removes the entry from the menu.wm.clearMenu(self)
Clears a full menu from all entries.wm.setMenuCallback(self, callback)
Se the callback of the menu.wm.drawMenu(self)
Displays a menu on screen.wm.menuSetPosition(self, x, y)
Changes the position of the menu.wm.menuUseFrame(self, state)
Set to true to use frames and the menu text, or false for just a menu with only the entries.-------------------------------------------------------------------------------
The modem functions are not needed to be used, but the collection of packet information will
not work without.wm.modemSend(addr, port, ...)
wm.modemBroadcast(port, ...)
Both functions are the same then the standard modem functions. They just collect some extra infos.wm.getModemPackets()
Returns sended packets, received packets, sended bytes, received bytes. Numbers are only correct, if
you use the modemSend and modemBroadcast functions.
-------------------------------------------------------------------------------Program manager functions.
If you have made a program for the gui system and you want to have it in your next program to without
copying the code into your new program, you can simply use your code with some changes in the program manager.
Have a look into plugin_framework.luawm.newSymbol(icon, program)
Creates a new symbol in the right-bottom corner of the screen. Icon is a single character and program the full
path to the lua program.wm.setSymbolIcon(self, icon)
Change the icon.wm.setSymbolProgram(self, program)
Change the program to start.wm.drawSymbol(self)
Draw a symbol. Usefull to redraw symbols from programs to window manager.
-------------------------------------------------------------------------------Functions for element manipulation.
Most of the names are telling you, what they do.
self is allways the element it self.
win is allways the window the element belongs to.
alignment can be "left", "center" or "right".
autowordwrap will fit the text into the element. great for labels.
state is allways true or false.guiElements.newElement(id, x, y, w, h, text)
guiElements.newRadioGroup(x, y, w, callback)
guiElements.newList(x, y, w, h, text, callback)
guiElements.newInput(x, y, w, text, callback)
guiElements.newCheckbox(x, y, text, callback)
guiElements.newHBar(x, y, w, h)
guiElements.newVSlider(x, y, h, callback)
guiElements.newHSlider(x, y, w, callback)
guiElements.newFrame(x, y, w, h)
guiElements.newLine(x, y, w)
guiElements.newLabel(x, y, w, h, text)
guiElements.newButton(x, y, w, h, text, callback)guiElements.drawElement(win, self)
Draws an element. Call it after changeing something on an element, to redraw it.
guiElements.setElementBackground(self, background)
guiElements.setElementForeground(self, foreground)
guiElements.setElementActiveBackground(self, background)
guiElements.setElementActiveForeground(self, foreground)
guiElements.setElementX(self, x)
guiElements.setElementY(self, y)
guiElements.setElementW(self, w)
guiElements.setElementH(self, h)
guiElements.setElementText(self, text)
guiElements.setElementCallback(self, callback)
guiElements.setElementAlignment(self, alignment)
guiElements.setElementMax(self, max)
guiElements.setElementMin(self, min)
guiElements.setElementValue(self, value)
guiElements.setElementState(self, state)
guiElements.setElementSteps(self, steps)
Stepsize for bars and sliders.
guiElements.setElementAutoWordWrap(self, state)
guiElements.setElementSelected(self, state)
guiElements.setElementProtected(self, state)
If true, input fields will only display *. good for passwords.
guiElements.getElementBackground(self)
guiElements.getElementForeground(self)
guiElements.getElementActiveBackground(self)
guiElements.getElementActiveForeground(self)
guiElements.getElementX(self)
guiElements.getElementY(self)
guiElements.getElementW(self)
guiElements.getElementH(self, h)
guiElements.getElementText(self)
guiElements.getElementAlignment(self)
guiElements.getElementMax(self)
guiElements.getElementMin(self)
guiElements.getElementValue(self)
guiElements.getElementState(self)
guiElements.getElementAutoWordWrap(self)
guiElements.getElementType(self)
guiElements.getLastElement()
guiElements.getElementProtected(self)
guiElements.getElementSelected(self)guiElements.insertElementData(self, data)
guiElements.removeElementData(self, num)
For lists
--------------------------------------------------------------------------------------------
Functions for coders who want make their own elements. Have a look into the guiElements.lua file
to see, how they work. Normal users don't need this functions.guiElements.setElementType(self, type)
guiElements.setElementDrawCallback(self, callback)
guiElements.setElementHandleCallback(self, callback)
guiElements.setElementUserData1(self, data)
guiElements.setElementUserData2(self, data)
guiElements.setElementUserData3(self, data)
guiElements.getElementUserData1(self)
guiElements.getElementUserData2(self)
guiElements.getElementUserData3(self)
guiElements.setElementIgnoreMouseBlock(self, state)
guiElements.getColors()wm.blockMouse(state)
wm.setMouseCallback(callback)
wm.getColors() -
Hmmm.... can't delete post. It's in the wrong place.
-
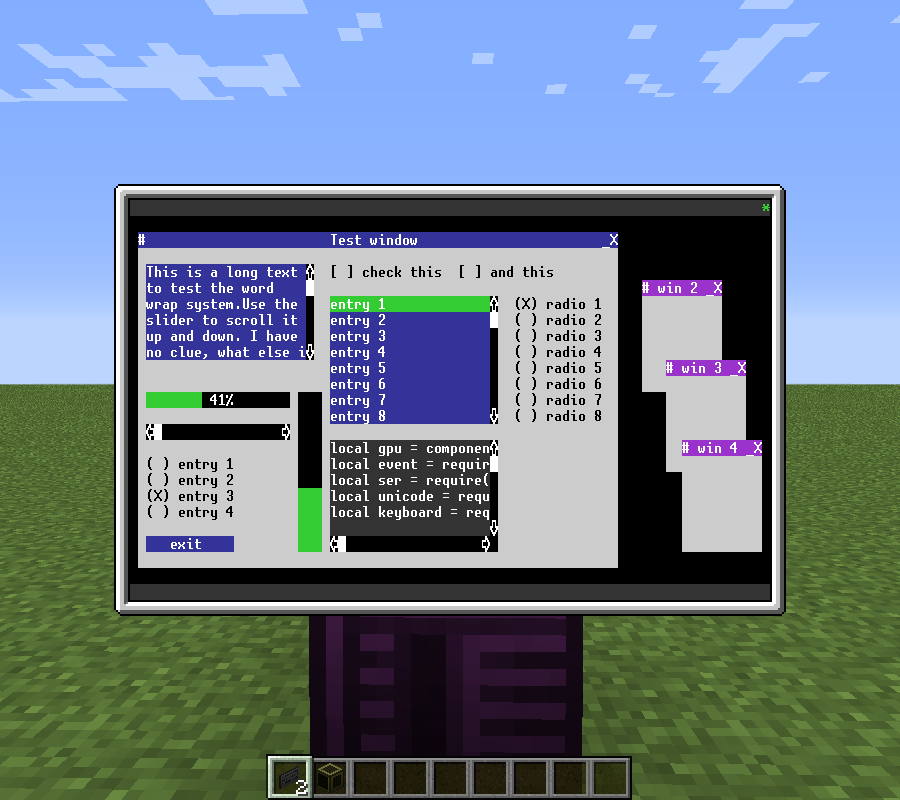
Hi,
i'm getting forward with the new gui system. Will publish after i finished it
Label with auto word wrap,
Checkboxes,
Radio button groups,
Slider,
Bars,
Buttons,
Movable windows,
Window manager,
User can define and create own elements with own draw routines and callbacks.
Doing full text editor now and input fields.
-
OK, now i am fully lost. That's too much for my little brain at the moment. Don't you think it is too complicated for the normal user? Most people using lua in OC are beginners , not coders. Even it is complicated to me, i am talking about the normal player, who just want to put some information on his screen.
-
The export of local functions i've solved.
Functions can be changed on every element.
Now a kind of custom element can be set by using the new element function directly. So, it's possible to make multiline label, taht acts like a button.
But i have no clue about OOP. Never used it.
Started coding when i used OC the first time ;-)
-
Someone allready taken a look at the new gui? I need feedback :-)
-
The door controller under the security door.
-
Looks like, i will leave it, like it is now.
Have started a new gui, because this one is not flexible enough
If someone want to test the new one, it's here https://pastebin.com/J4SXwzHa
Dokumentation is on top of the file.
At the moment it only has 2 elements, a button and a label, but i am working on more.
When i've finished it, i will make a new threat.
-
I will start reworking it 2morro. Hope i get it done over the weekend. Depends on the weather outside.
-
I will remake it completely, if i find the time or it will rain outside.
Have some more ideas, but at the moment i have to train a horse first as my major time shedule.
If you have any ideas for a nice security system, let me know and i will see, what i can do.


Print server and client for openprinter
in Libraries & API's
Posted
Btw. the functions for the virtuel network printer are the same, then for a normal openprinter.
Look here